Google authentication in Wise Chat Pro
Wise Chat Pro users can use their own Google accounts to log in to the chat. Thus, there is no need for a separate account in your website. A regular Google account is enough to get authenticated.
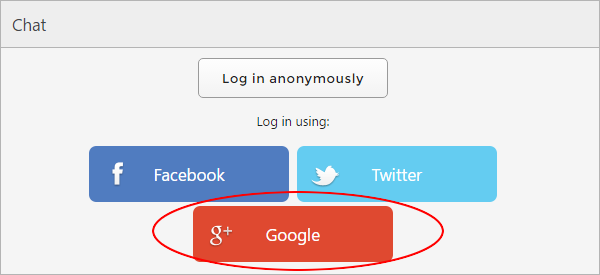
From the user’s perspective Google authentication is very simple. User clicks Google login button in Wise Chat Pro and then is redirected to Google site where he/she logs in to Google normally. Wise Chat Pro gains permission to use Google account for authentication purpose. After this, the user is redirected back to Wise Chat Pro page and immediately becomes authenticated.
When user logs in via Google the following data is transferred to Wise Chat Pro:
- user name
- profile URL
- avatar image URL
Before you configure Google authentication
- Disable Anonymous Users
- Force Username Selection
It is crucial.
How to set Google authentication
To enable Google authentication in Wise Chat Pro you will need Client ID and Client Secret. In order to get these two values you have to:
1. Log in to https://console.developers.google.com using your regular Google account.
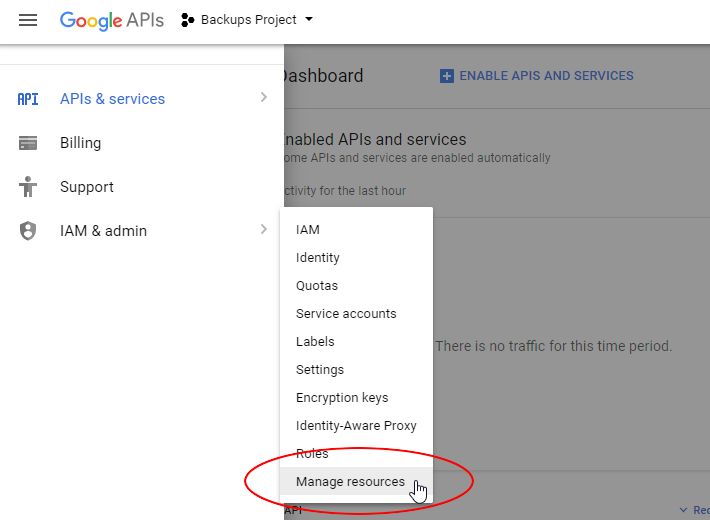
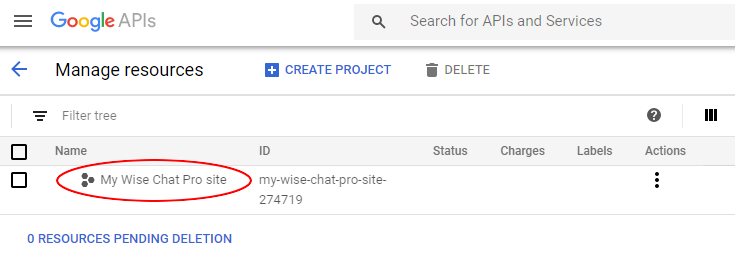
2. At the top left corner click menu icon, then IAM & admin and Manage resources.
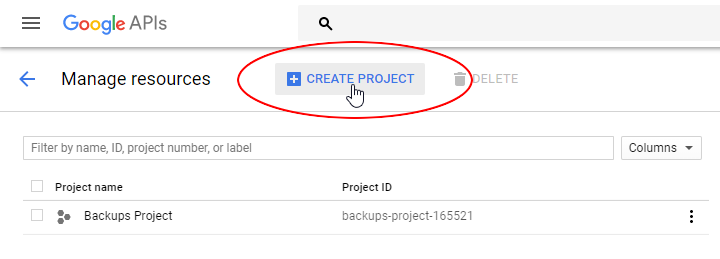
3. Click Create Project button.
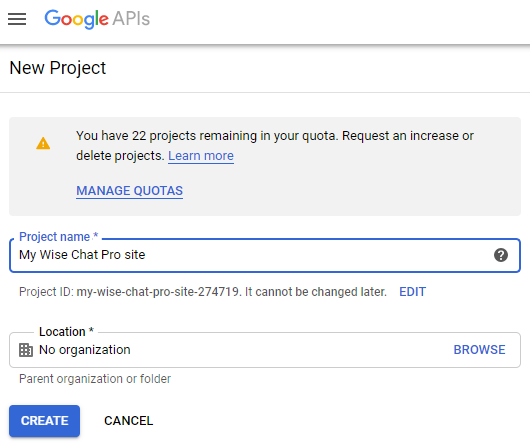
4. Enter the name of your project and click Create button.
5. Wait a minute and refresh prjects list. You should be able to see your newly created project there. Click on the project’s name
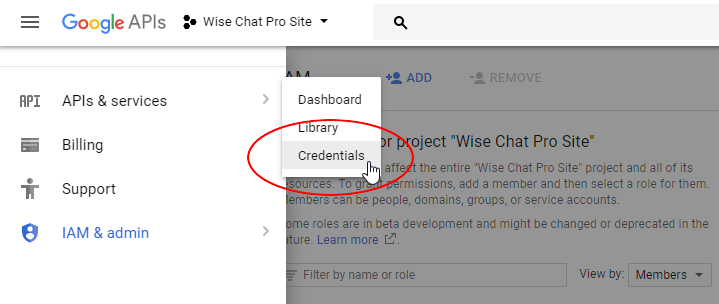
6. At the top left corner click menu icon, then API & services and Credentials.
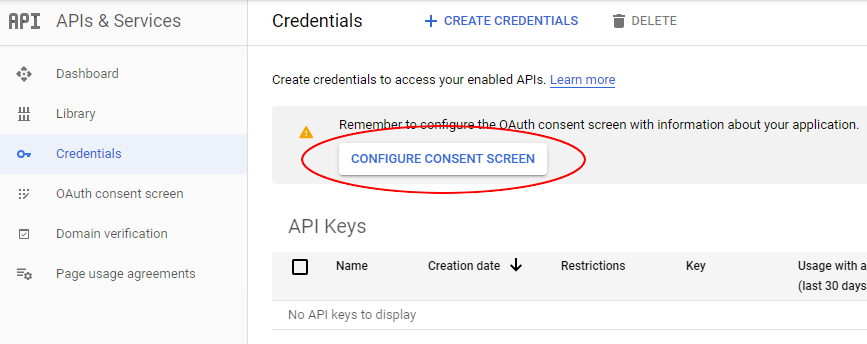
7. Click Configure Consent Screen button.
In the next form select External option and click Create button.
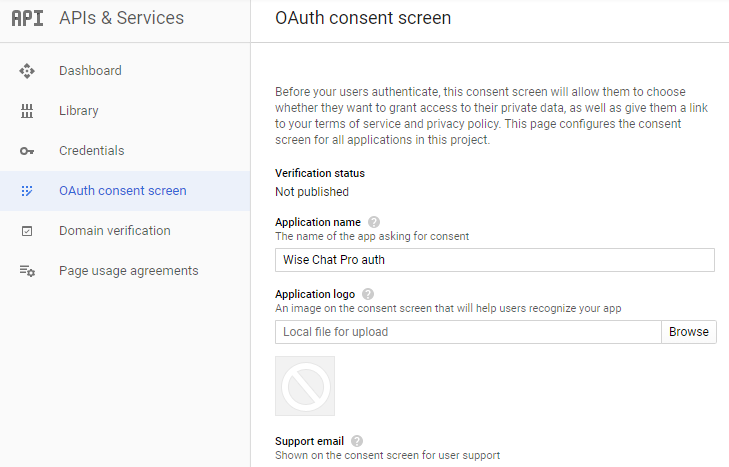
8. In the OAuth consent screen form fill Application name and Authorized domains fields and then click Save button. Authorized domain is the domain you run the chat on.
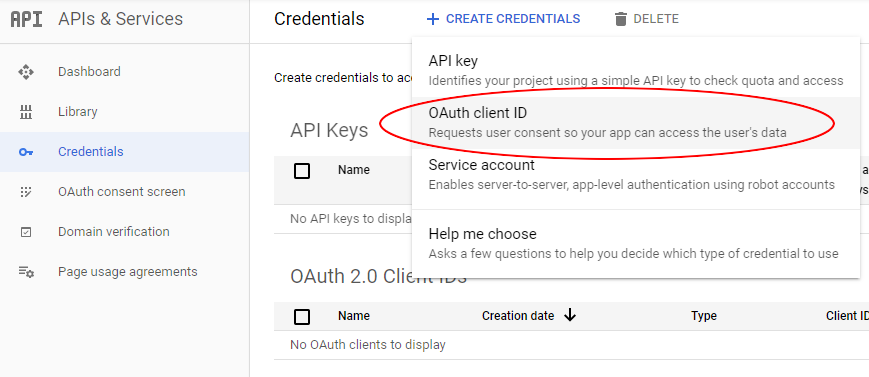
9. In the left menu click Credentials. The click Create credentials button and choose OAuth client ID option.
10. Under Application type, select Web application. Fill Name field and add Authorized redirect URI. Be careful to put the correct URI in this field. It has to be the exact direct URL to the page where you have installed Wise Chat Pro on your website. Additionally attach “?wcExternalLogin=go” text to the end of the URL. For example:http://example.com/chat/?wcExternalLogin=go
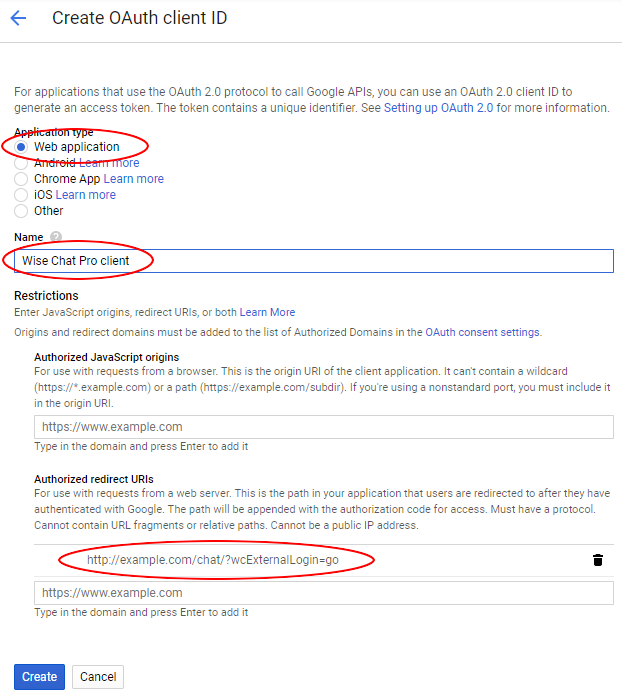
Press Create button.
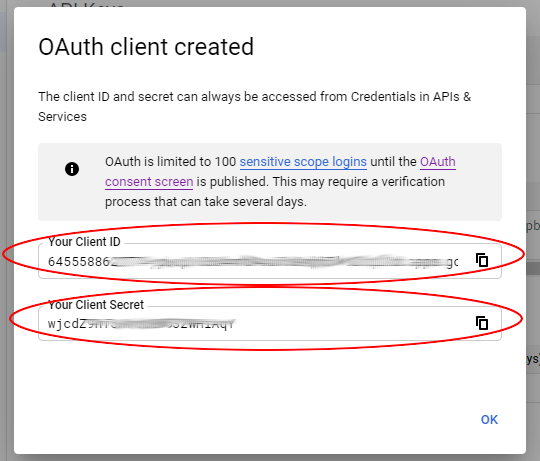
11. From the resulting OAuth client dialog box copy the Client ID and Client Secret.
12. Log in to your WordPress website as an administrator. Go to Settings / Wise Chat Pro Settings page and click External login tab. Scroll down to see the following form:
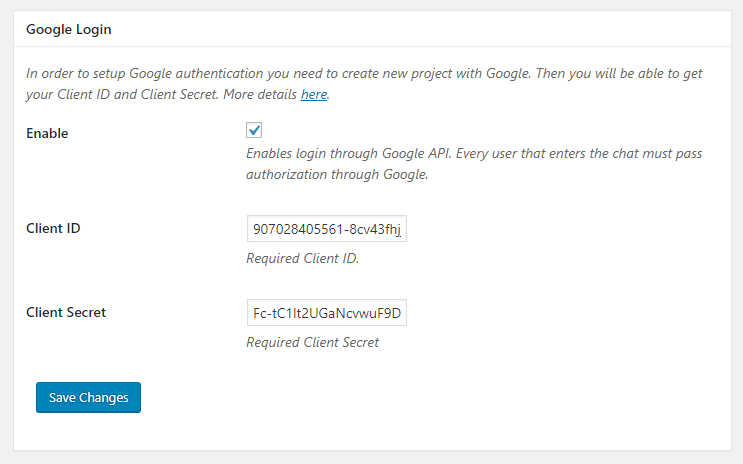
Fill Client ID and Client Secret fields with values that you have copied in the previous step of this tutorial. After you save the form Google authentication is complete.
